INSTRUCTION FOR SALT SCRUB
Hello!
First of all, I congratulate you on stepping into fresh, handmade and natural cosmetics!
Thank you for getting our help on your new journey.
You may be a little nervous to see if you can make it.
This is a very normal feeling that your brain feels when starting a new task so that it can adapt better.
Now take a deep breath and enjoy the task.
Why you should enjoy the task ?
Because I have handled all the stresfull part for you ! Choosing, finding and scaling the ingredients to reach the right product texture and effect.
I met hundereds of people who are interested in natural skincare and they attended my workshops, my trainings and my webinars. As I observed, for a new beginner the most stressfull part of the DIY cosmetics is handling (choosing, buying, scaling!) the ingredients. The most pleasent part of the DIY cosmetics is the experience of making a functional product that you can actually use it!
The process is specially designed for you to both gain a new skill and feel the satisfaction of achievement of a task.
The box in your hand is offer you both an experience and a fresh, handmade, natural cosmetic product.
Isn't it great
Let's get started, shall we ?
Step 1: Getting know the ingredients


Here is the box!
Let's open it!


What do you need to provide from home to make Salt Scrub ?
- Clean, dry heat resistant mixing bowl or beaker
- Clean, dry stirring rod
- A double boiler
How to set up a simple double boiler?
All you need to have a stainless steel souce pan, water and heater.
Fill the souce pan 2-3 cm water and put on the heater. Wait untill it boils. When it boils decrease the heat to a medium level. Asure that the bottles don't float on the water, they should stand still to avoid topple.
 That is how a simple double boiler look like!
Step 2 : How to Make it
 1- Add Emulsifying Wax in to the heat resistant beaker or mixing bowl.
2- Take Apricot Kernel Oil Bottle to place in the double boiler.
 3- Place the Shea Butter and heat resistant beaker in the double boiler which is operating at a medium heath level. Wait until emulsifying wax melt and while Apricot Kernel Oil warming.
 4- Melted emulsifying wax shold looks like this.
 5- Add Apricot Kernel Oil
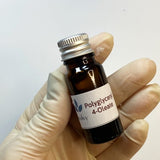
 6- Add Polyglyceryl 4-Oleate
 7- Polyglyceryl 4-oleate is a viscous liquid. Wait untill its completelt ron down from the bottle. It may take a while :)
 8- Add melted Castor Oil to the mixture.
 9- Add Pink Himalayan Salt
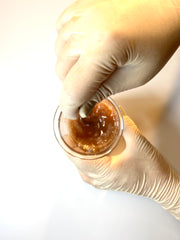
 10- Stir very well
 11- Add Pink Frech Clay
 12- Stir very well until there is no lumps in the mixture.
13- Add Castor Oil.
 14- Next Vitamin E
 15- Mix ver well
 16- For a herbal-menthol aroma add Peppermint Essential Oil. It's all optional. If you don't like herbal-menthol aromas you can add another essential oil whichever you want or you can prepare the product without an essential oil if you prefer unscented. The limit of the essential oil in this product is 30 drops. (1,5 ml)
 17- Mix very well.
It's almost done!
 18- Time to pour its package.
 19- Pour the mixture in the aluminium jar.
 20- Mix for the last time
You can use it when it comes to room temperature.
The scrub gets the best consistency after 24 hours.
The salt is heavier than the mixture so it tend to stay at the bottom of the jar so if you mix it very well after it cool down; you can easily take it from the jar for every single use.
Step 3: How to Use it
Recommended use at body, hands and feet once in a week.
Take a small amount of scrub on your finger. Put on your skin part where desired and gently circular massage for 1-2 minutes. Rinse after massaging and apply your favorite lotion.
Do not apply extra pressure while using all scrubs. Gently massaging will be enough for a healthy scrubbing. Otherwise you may cause irritation.
Avoid to apply neck.
Hope you like the experience of making your own Body Scrub
And hope you will love to use an Salt Scrub for your body as well.
If you haven't try the rest of our Ready to make DIY Kits you can check out from this link.